Learn to build a simple responsive quiz app Using Javascript, html and css
Why it is important to build a simple quiz app using HTML, CSS, and JS?
In the journey of web development, creating a simple quiz app with HTML, CSS, and JavaScript can be a great way to learn Web Development. Learning web development might sound tricky, but it can be fun! Imagine creating a simple quiz app using HTML, CSS, and JavaScript. It’s like playing with building blocks to make something cool on the internet.
But why make a quiz app? Well, it’s a fantastic way to practice and get better at web development.
Firstly, it helps you understand HTML, the back bone of a web page. You learn how to structure your quiz questions neatly. Then comes CSS, which makes your app look pretty. You get to style your quiz, choosing colors, fonts, and layouts.
And here’s the cool part: JavaScript! It’s like the brain of your quiz app. It makes things happen when you click buttons. You learn how to change content, handle answers, and move between questions.
Making a quiz app isn’t just about coding. It’s about problem-solving. You’ll face little challenges along the way. But overcoming these challenges teaches you how to think like a coder. It helps you become better at finding solutions.
Also, by building a quiz app, you’re practicing important skills used in real web development projects. You’re not just memorizing, you’re actually doing it!
Starting with a simple quiz app is like taking small steps toward becoming a web developer. It’s a fun, practical way to learn and grow your skills.
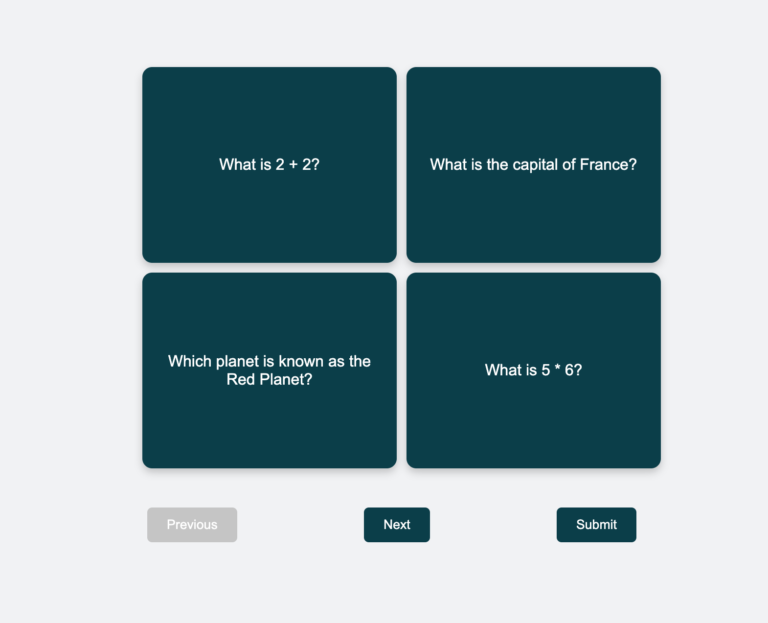
The information shared in this article is for creating a simple responsive quiz application, where the user can answer multiple-choice questions and see their results at the end. By means of this project, you can learn and deepen your knowledge about JavaScript DOM, which stands for Document Object Model. The DOM is a way of representing and manipulating HTML elements using JavaScript. You can use the DOM to create dynamic and interactive web pages, such as this quiz app. Take a moment to watch the following video showcasing the quiz app in action.
In this article, we will show all the code for the Quiz App and we hope you will deepen your knowledge regarding html, css and vanilla JS. To accomplish this project, follow the step by step guide on this article.
Step 1: Create a new folder on your computer. Name it appropriately, then within this folder, create three files:
- ‘
quiz.html'for HTML code. - ‘
styles.css'for CSS code. - ‘
script.js'for JavaScript code.
COPY HTML CODE
Step 2: Copy the below provided HTML code and paste it into your ‘quiz.html‘ file.
<!DOCTYPE html>
<html lang="en">
<head>
  <meta charset="UTF-8">
  <title>Animated Quiz App</title>
  <link rel="stylesheet" href="styles.css">
</head>
<body>
  <div class="quiz-container">
    <div id="card-container" class="card-container"></div>
    <div class="navigation">
      <button id="prevBtn" onclick="prevQuestion()">Prev</button>
      <button id="nextBtn" onclick="nextQuestion()">Next</button>
      <button id="finishBtn" onclick="finishQuiz()">Finish</button>
    </div>
  </div>
  <div id="resultPopup" class="popup">
    <div id="resultContent"></div>
    <button onclick="closePopup()">Close</button>
  </div>
  <body>
    <!-- Existing HTML code for quiz container and other elements -->
    <div class="overlay" id="overlay"></div>
  </body>

  <script src="script.js"></script>
</body>
</html>
COPY CSS CODE
Step 3: The CSS code defines the style and appearance of the web page. Enhance the visual appeal of your quiz by copying the following CSS codes into your “styles.css” file. You can change some elements such as colors, fonts, backgrounds to make more appealing.
/*Styles for quiz container, cards, buttons, and popup*/
.quiz-container {
  text-align: center;
  padding: 20px;
}
.card-container {
  display: flex;
  justify-content: center;
  align-items: center;
  height: 300px;
}
/*Background style of quiz cards*/
.card {
  background-color: #fff;
  border-radius: 8px;
  box-shadow: 0 4px 8px rgba(0, 0, 0, 0.1);
  padding: 20px;
  margin: 0 10px;
  max-width: 400px;
  width: 100%;
  opacity: 0;
  transform: translateY(50px);
  transition: opacity 0.5s ease, transform 0.5s ease;
}
.card.active {
  opacity: 1;
  transform: translateY(0);
}
.navigation {
  margin-top: 20px;
}
/* Styles for the result popup */
.popup {
  display: none;
  position: fixed;
  top: 50%;
  left: 50%;
  transform: translate(-50%, -50%);
  background: white;
  padding: 20px;
  border: 2px solid #ccc;
  z-index: 9999;
  text-align: center;
  width: 50%;
  height: auto;
  overflow: auto;
  box-shadow: 0 0 10px rgba(0, 0, 0, 0.3);
}
/* Styles for the background overlay */
.overlay {
  position: fixed;
  top: 0;
  left: 0;
  width: 100%;
  height: 100%;
  backdrop-filter: blur(5px);
  z-index: 9998;
}
.overlay {
  display: none;
}
.correct {
  color: green;
}
.wrong {
  color: red;
}
/* styles for quiz options */
.options {
  display: flex;
  flex-direction: column;
  gap: 10px;
  margin-top: 20px;
}
.options button {
  padding: 10px;
  border: 1px solid #ccc;
  border-radius: 5px;
  background-color: #f5f5f5;
  cursor: pointer;
  transition: background-color 0.3s ease;
}
.options button:hover {
  background-color: #e0e0e0;
}
/*styles for selected options */
.options button.selected {
  background-color: #a7d8f0;
}
/* Styling for buttons */
button {
  padding: 10px 20px;
  border: none;
  border-radius: 5px;
  font-size: 16px;
  cursor: pointer;
  transition: background-color 0.3s ease;
}
button:hover {
  background-color: #4caf50;
  color: white;
}
/* Styling for specific buttons */
#prevBtn,
#nextBtn,
#finishBtn {
  background-color: #f0f0f0;
  color: #333;
  margin-right: 10px;
}
#prevBtn:hover,
#nextBtn:hover,
#finishBtn:hover {
  background-color: #ddd;
}
COPY JAVASCRIPT CODE
Step 4: JavaScript! As we mentioned earlier in this article, It’s like the brain of your quiz app. It makes things happen when you click buttons. Copy and Paste the following code in your “script.js” file.
const questions = [
  {
    question: "1. What is the capital of France?",
    options: ["Paris", "London", "Berlin", "Madrid"],
    answer: "Paris",
  },
  {
    question: "2. What is the capital of Germany?",
    options: ["Paris", "London", "Berlin", "Madrid"],
    answer: "Berlin",
  },
  {
    question: "3. What is the capital of England?",
    options: ["Paris", "London", "Berlin", "Madrid"],
    answer: "London",
  },
  {
    question: "4. What is the capital of India",
    options: ["Paris", "London", "Berlin", "New Delhi"],
    answer: "New Delhi",
  },
  {
    question: "5. What is the capital of Nepal?",
    options: ["Paris", "London", "KTM", "Madrid"],
    answer: "KTM",
  },
  {
    question: "6. What is the capital of Philippines?",
    options: ["Paris", "London", "Berlin", "Manila"],
    answer: "Manila",
  },
  {
    question: "7. What is the capital of Japan?",
    options: ["Paris", "Tokyo", "Berlin", "Madrid"],
    answer: "Tokyo",
  },
  {
    question: "8. What is the capital of South Korea?",
    options: ["Paris", "Seol", "Berlin", "Madrid"],
    answer: "Seol",
  },
  {
    question: "9. What is the capital of Poland?",
    options: ["Paris", "Warsaw", "Berlin", "Madrid"],
    answer: "Warsaw",
  },
  {
    question: "10. What is the capital of USA?",
    options: ["Paris", "Washington", "Berlin", "Madrid"],
    answer: "Washington",
  },
  // Add more questions in the same format
];

let currentQuestion = 0;
let userAnswers = [];

function displayQuestion() {
    const cardContainer = document.getElementById('card-container');
    const card = document.createElement('div');
    card.classList.add('card');

    const current = questions[currentQuestion];
    const options = current.options.map(option => `<button onclick="selectAnswer('${option}')">${option}</button>`).join('');

    card.innerHTML = `
      <h2>${current.question}</h2>
      <div class="options">${options}</div>
    `;

    cardContainer.innerHTML = '';
    cardContainer.appendChild(card);

    setTimeout(() => {
      card.classList.add('active');
    }, 100);

    updateButtons();
  }

  function selectAnswer(answer) {
    userAnswers[currentQuestion] = answer;
  }
  function selectAnswer(answer) {
    const options = document.querySelectorAll('.options button');
    options.forEach(option => {
      option.classList.remove('selected');
      if (option.textContent === answer) {
        option.classList.add('selected');
      }
    });
    userAnswers[currentQuestion] = answer;
  }

function nextQuestion() {
  if (currentQuestion < questions.length - 1) {
    currentQuestion++;
    displayQuestion();
  }
}

function prevQuestion() {
  if (currentQuestion > 0) {
    currentQuestion--;
    displayQuestion();
  }
}

function updateButtons() {
    const prevBtn = document.getElementById('prevBtn');
    const nextBtn = document.getElementById('nextBtn');
    const finishBtn = document.getElementById('finishBtn');

    prevBtn.disabled = currentQuestion === 0;
    finishBtn.disabled = currentQuestion !== questions.length - 1;
    nextBtn.disabled = currentQuestion === questions.length - 1;
  }

function finishQuiz() {
    const resultPopup = document.getElementById('resultPopup');
    const overlay = document.getElementById('overlay');
    const resultContent = document.getElementById('resultContent');
    resultContent.innerHTML = '';

    questions.forEach((question, index) => {
      const userAnswer = userAnswers[index];
      const result = document.createElement('p');
      const isCorrect = userAnswer === question.answer;

      result.textContent = `Question ${index + 1}: ${
        isCorrect ? 'Correct' : 'Wrong'
      }`;

      result.classList.add(isCorrect ? 'correct' : 'wrong');
      resultContent.appendChild(result);
    });

    resultPopup.style.display = 'block';
    overlay.style.display = 'block'; // Show the overlay
  }
function resetQuiz() {
    currentQuestion = 0;
    userAnswers = [];
    displayQuestion();
  }

  function closePopup() {
    const resultPopup = document.getElementById('resultPopup');
    resultPopup.style.display = 'none';
    resetQuiz(); // Reset the quiz when closing the popup
  }

  resetQuiz(); // Call resetQuiz initially to set up the quiz

  function closePopup() {
    const resultPopup = document.getElementById('resultPopup');
    const overlay = document.getElementById('overlay');

    resultPopup.style.display = 'none';
    overlay.style.display = 'none'; // Hide the overlay

    resetQuiz(); // Reset the quiz
  }

displayQuestion();
Now, open your “quiz.html” file in any web browser and it should work perfectly. With HTML, CSS, and JavaScript you have created simple and responsive quiz app. You can now customize the HTML, CSS and JavaScript elements with your desired content and further customize the CSS styles to match your designs.
Conclusion
Making a quiz app is like this is playing with building blocks on the internet. It helps you learn HTML, CSS, and JavaScript in a fun way. By solving little challenges, you become better at coding. Building a quiz app is a great start to becoming a web developer. So, start coding, have fun, and keep learning!
If you face any problems while making your quiz app, you can download the project’s source code files for free by clicking the Download button.

