Learn to Make Beautiful Login & Registration Form Using HTML, CSS and JavaScript
Beautiful Login & Registration Form
If you’re new to making websites, creating login and registration forms is a great way to practice your skills in HTML, CSS, and JavaScript. In this blog post, I’ll show you how to make login and registration forms that work well on any device. When you finish this project, you’ll have hands-on experience and know about important web development ideas like DOM manipulation, event handling, conditional statements.
For this project, we’ll make a form that pops up when you click on the button. The form has “Login” and “Register” buttons at the top, and below will be input fields to type in your information. If you want to Register instead, simply click on the Register button and you’ll be taken to the registration pop up window.
Here’s a step-by-step guide for this project. By the end of this blog post, you’ll have your own login and registration forms that you can easily adjust and use in other projects.
Steps to Make Login & Registration Form
- First, make a folder with any name you like. Then,
- Create a file named “index.html” for your main page.
- Make a file called “style.css” for the design of your form.
- Create a file called “script.js” for your JavaScript code.
Now, add these HTML codes to your “index.html” file. These codes have important HTML parts like containers, forms, and more for the project.
<!DOCTYPE html>
<html lang="en">
<head>
  <meta charset="UTF-8">
  <meta name="viewport" content="width=device-width, initial-scale=1.0">
  <title>Login and Register Form</title>
  <link rel="stylesheet" href="style.css">
</head>
<body>
  <div class="container">
    <div class="form-container">
      <div class="form-toggle">
        <button id="login-toggle">Login</button>
        <button id="register-toggle">Register</button>
      </div>
      <form id="login-form" class="form">
        <h2>Login</h2>
        <div class="input-container">
          <input type="text" placeholder="Email" id="login-email">
        </div>
        <div class="input-container">
          <input type="password" placeholder="Password" id="login-password">
        </div>
        <button type="button" onclick="login()">Login</button>
       <!-- <p>Not yet registered? <a href="#" id="register-link">Register</a></p>-->
      </form>
      <form id="register-form" class="form">
        <h2>Register</h2>
        <div class="input-container">
          <input type="text" placeholder="First Name" id="first-name">
        </div>
        <div class="input-container">
          <input type="text" placeholder="Last Name" id="last-name">
        </div>
        <div class="input-container">
          <input type="text" placeholder="Email" id="register-email">
        </div>
        <div class="input-container">
          <input type="text" placeholder="Phone" id="phone">
        </div>
        <div class="input-container">
          <input type="password" placeholder="Password" id="register-password">
        </div>
        <button type="button" onclick="register()">Register</button>
      </form>
    </div>
  </div>
  <script src="script.js"></script>
  </body>
</html>
Next, include these CSS codes in your “style.css” file to make your login and registration form look good. You can try different things like colors, fonts, and backgrounds to make your form unique.
body {
    margin: 0;
    padding: 0;
    font-family: Arial, sans-serif;
    background-image: url('Please Link Image of your choice');
    background-size: cover;
    display: flex;
    justify-content: center;
    align-items: center;
    height: 100vh;
    background-color: #cccccc;
  }

  .container {
    background-color: #004754;
    border-radius: 10px;
    box-shadow: 0 0 10px rgba(50, 35, 162, 0.9);
    display: flex;
    flex-direction: column;
    width: 100%;
    max-width: 400px;
    padding: 20px;
  }

  .form-container {
    text-align: center;
    padding-top: 25px;
  }

  .form-toggle {
    margin-bottom: 20px;
  }

  .form-toggle button {
    background-color: transparent;
    border: none;
    padding: 10px 20px;
    cursor: pointer;
    transition: background-color 0.3s;
  }

  .form-toggle button:hover {
    background-color: #bebd00;
  }

  .form {
    display: none;
    width: 100%;
  }
  .form p {
    color: white;
    font-size: 12px;
  }
  .form p a {
    color: white;
    cursor: pointer;
    text-decoration: none;
    font-size: 12px;
  }
  .form p a:hover{
    color: #bebd00;
  }
  .form h2 {
    font-size: 24px;
    margin: 0 0 20px;
    color: white;
  }

  .input-container {
    margin-bottom: 15px;
    margin-right: 20px;
  }

  .input-container input {
    width: 100%;
    padding: 10px;
    border: 1px solid #ddd;

  }

  button {
    background-color: #bebd00;
    color: #fff;
    border: none;
    padding: 10px;

    cursor: pointer;
  }

  button:hover {
    background-color: #333333;
  }
After applying the styles, open your web page in your browser to see your form. You should see something like the picture below:
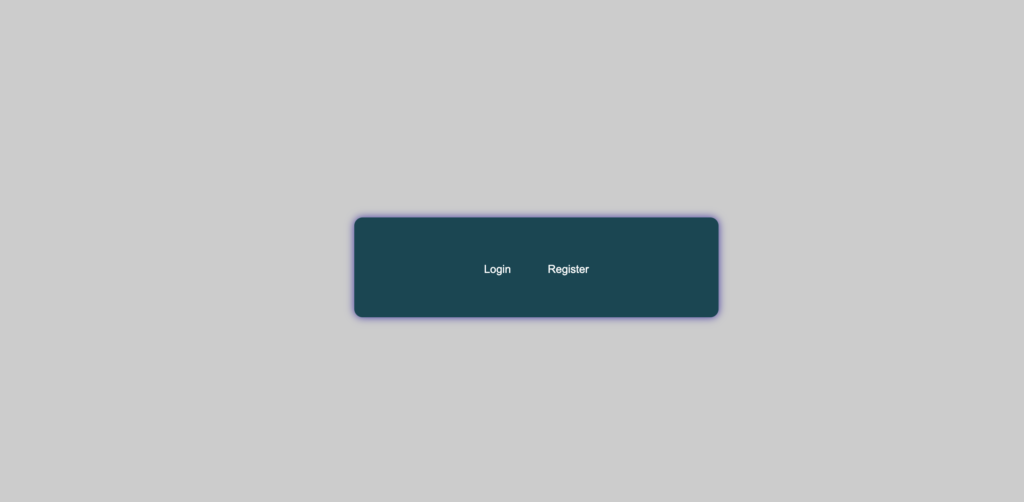
If you try to click the “Login” or “Register” buttons, they won’t do anything. To make them work, we need some JavaScript code.
Finally, add this JavaScript code to your “script.js” file. This code makes the “Login” and “Register” buttons do what they’re supposed to do. It uses “if” statements to decide what to do when you click.
document.getElementById('login-toggle').addEventListener('click', () => toggleForm('login'));
document.getElementById('register-toggle').addEventListener('click', () => toggleForm('register'));

function toggleForm(formType) {
  const loginForm = document.getElementById('login-form');
  const registerForm = document.getElementById('register-form');
  if (formType === 'login') {
    loginForm.style.display = 'block';
    registerForm.style.display = 'none';
  } else if (formType === 'register') {
    loginForm.style.display = 'none';
    registerForm.style.display = 'block';
  }
}
Now, try clicking the “Login” and “Register” buttons, and they should work as expected.
Conclusion
In summary, creating simple login and registration forms is a hands-on way to learn different parts of websites and important web development ideas. I believe that by following the steps in this blog post, you’ve successfully made your own beautiful login and registration forms with HTML, CSS, and JavaScript.
If you face any problems while making your form, you can download the project’s source code files for free by clicking the “Download” button.